Stuffed Animal Storage
Hi! I hope you all had a wonderful Memorial Day weekend! It was my my 14th wedding anniversary, so I was able to get away with my husband for one night while the kids stayed with my in-laws. We had not been away together overnight ALONE for 2 years! I also realized that it was my first night away from the girls ALONE for 2 years! That's just not right, is it Mom's? We all need a break from our children now and then, no matter how much we love them. Of course, I missed them like crazy the whole time we were away from them!
Speaking of the wee ones. If you have children you know.....you KNOW....how out of control the stuffed animal LOVE can be. I finally had to tell each girl, b/c they share a room, that they needed to choose their 'Top Ten' stuffed animals to stay with them, but the others were going into the garage. The deal is that every 6 months we will get the container out and then they can choose another top 10. Well, even 10 animals is a lot! And if your children share a room like my girls do, that means 20 animals floating around the room or wasting place in their closet.
I decided I had to come up with something. I had considered the 'sew a bean bag' idea. That sounded pretty neat at first, but it really does not solve the problem of the 'late night/last minute'..."Mom, I need Lamby! Oh...Oh...I also need....Tiger." So, there I am trying to dig through that bean bag ball!
Anyway, you get the idea. Enough talking! You can take it or leave it. It's not perfect, but it I think it works best for my girls.

If you would like to make this, here is how I did it!
STEP 1) Decide how big you want your Animal Hotel and cut your fabric. Mine is 28" x 36". Add 1" to the length and height for hemming of all sides. I used a heavy bottom weight fabric in black.


STEP 2) Take fabric and start hemming each side by folding over 1/4" once and then fold again another 1/4". Pin and sew as close to the edge as you can. Backstitch at beginning and at every corner, if you want.


STEP 3) Now it is time to add some decorations if you want. I have been reading a lot about painting with Acrylics on fabric lately, so I wanted to give that a try. If you have read other post, you also know that I am interested in free motion stitching, so I decided to do some 'messy' stitching on top of the letter after the paint was dry.
You will also notice that there is stitching around the lettering. I actually was practicing on a scrap piece to see if I liked the pink paint. I decided to just stitch that onto the main fabric so I would not have to do it again! I used a zig zag stitch all the way around 2x.
 *Acrylic Paints: You can find this type of paint at any craft store, even Wal-Mart. It can be used on all types of material, including fabric. There are low end and upper end acrylic paints. Since I am just learning, I'm starting with the cheapest I can find. These 2 oz bottles are on sale at Hobby Lobby this week.
____________________________________________________________________________
A NOTE ABOUT FREE MOTION STITCHING- SKIP THIS STEP IF YOU DON'T CARE! :)
*Free Motion Stitching: Far away you can hardly see my messy stitching, but it was good practice. I really wanted to free motion around the flowers, but did not want to waste the thread. If you would like to try some free motion stitching, here are the steps you need to follow.
1. Find a darning foot or a free motion quilting foot. I bought mine from Amazon- click HERE to see. I altered mine a little, but bought this one b/c it is the most affordable.
2. Lower your feed dogs. The feed dogs are what moves the material along as you are sewing. When you are free motion sewing you want these to be down so YOU can be the one moving the fabric wherever you want it to go. You will have to consult your sewing machine's manual to see how to do this. Mine has a little switch on the back of the machine. The arm of my machine is actually hiding it.
3. Set stitch length to 0 and select the straight stitch setting.
4. Stitch away! Slow and steady!
_____________________________________________________________________________
 Yes, that is a 2L soda bottle. And yest, it still has soda in it! :) I saw this technique recently on a post from Happy House and Home, titled "Painting with a Soda Bottle". I can't believe I have never seen this before! It worked great.
 I then used a cork to make the perfect center for my flower.

And voila! My girls loved it, of course!

STEP 4) It's now time to add some elastic to hold the animals in place. I used Non-Roll Elastic, 3/4 wide. I sewed a zig zag stitch every 5 inches or so. I made a couple only 4" apart for smaller animals. For the bottom row, I added a little give so the bigger animals could squeeze in a little more easily. Make sure you stitch back and for A LOT so the elastic is very secure.

STEP 5) Hanging this puppy is what I was concerned about. I really wanted grommets, but that THING you have to buy to add the grommets was really expensive. Maybe there is a cheaper way? I decided to just make 5 button holes instead and then just nail it to the wall. I thought the button hole would prevent the material from tearing? It looks pretty stable to me. If I have issues I'll let you know. If you have any better ideas, please let me know!

All that is left is to add those animals. I was able to make 12 spaces for animals. I squeezed 2 little ones in 1 and squeezed in a couple of barbie dolls too. Last night my oldest reached up and picked out what she wanted to sleep with, 5 to be exact. And then this morning she made her bed and put them back. I could tell she thought that was fun.
Now for the other bug-a-boo. She is in a toddler bed, so I think I'll turn the fabric the other way. It looks better if it is about the same size as their bed. I'll post that one when I'm finished. She wants purple paint, which I don't have, of course! :)
If you make one of these will you please let me know so I can see it!
If you want to know when I post next you can do the following:
1. Like me on facebook: www.facebook.com/ginascraftcorner
2. Follow me by clicking on the blue "Join this site" tab
3. G+1 me at the bottom of this post.
Thanks for visiting!
~Gina
Speaking of the wee ones. If you have children you know.....you KNOW....how out of control the stuffed animal LOVE can be. I finally had to tell each girl, b/c they share a room, that they needed to choose their 'Top Ten' stuffed animals to stay with them, but the others were going into the garage. The deal is that every 6 months we will get the container out and then they can choose another top 10. Well, even 10 animals is a lot! And if your children share a room like my girls do, that means 20 animals floating around the room or wasting place in their closet.
I decided I had to come up with something. I had considered the 'sew a bean bag' idea. That sounded pretty neat at first, but it really does not solve the problem of the 'late night/last minute'..."Mom, I need Lamby! Oh...Oh...I also need....Tiger." So, there I am trying to dig through that bean bag ball!
Anyway, you get the idea. Enough talking! You can take it or leave it. It's not perfect, but it I think it works best for my girls.

If you would like to make this, here is how I did it!
STEP 1) Decide how big you want your Animal Hotel and cut your fabric. Mine is 28" x 36". Add 1" to the length and height for hemming of all sides. I used a heavy bottom weight fabric in black.
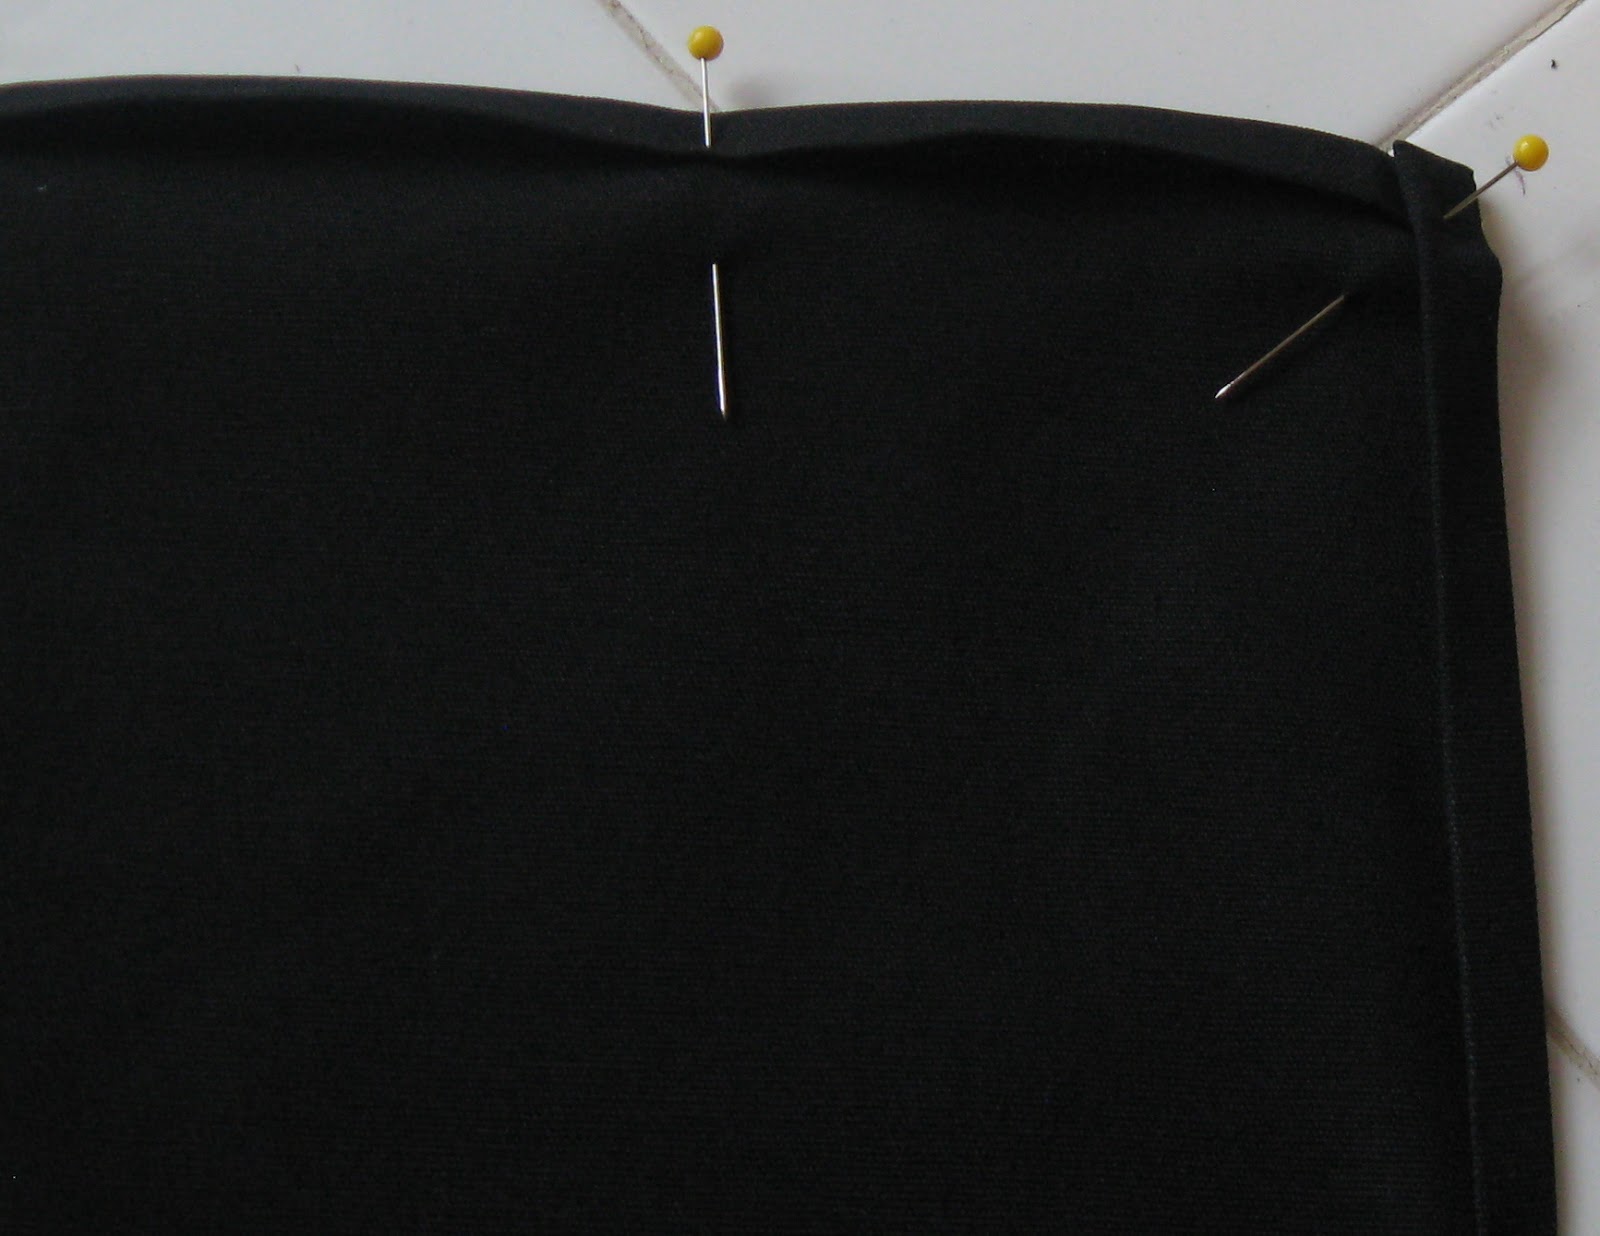

STEP 2) Take fabric and start hemming each side by folding over 1/4" once and then fold again another 1/4". Pin and sew as close to the edge as you can. Backstitch at beginning and at every corner, if you want.
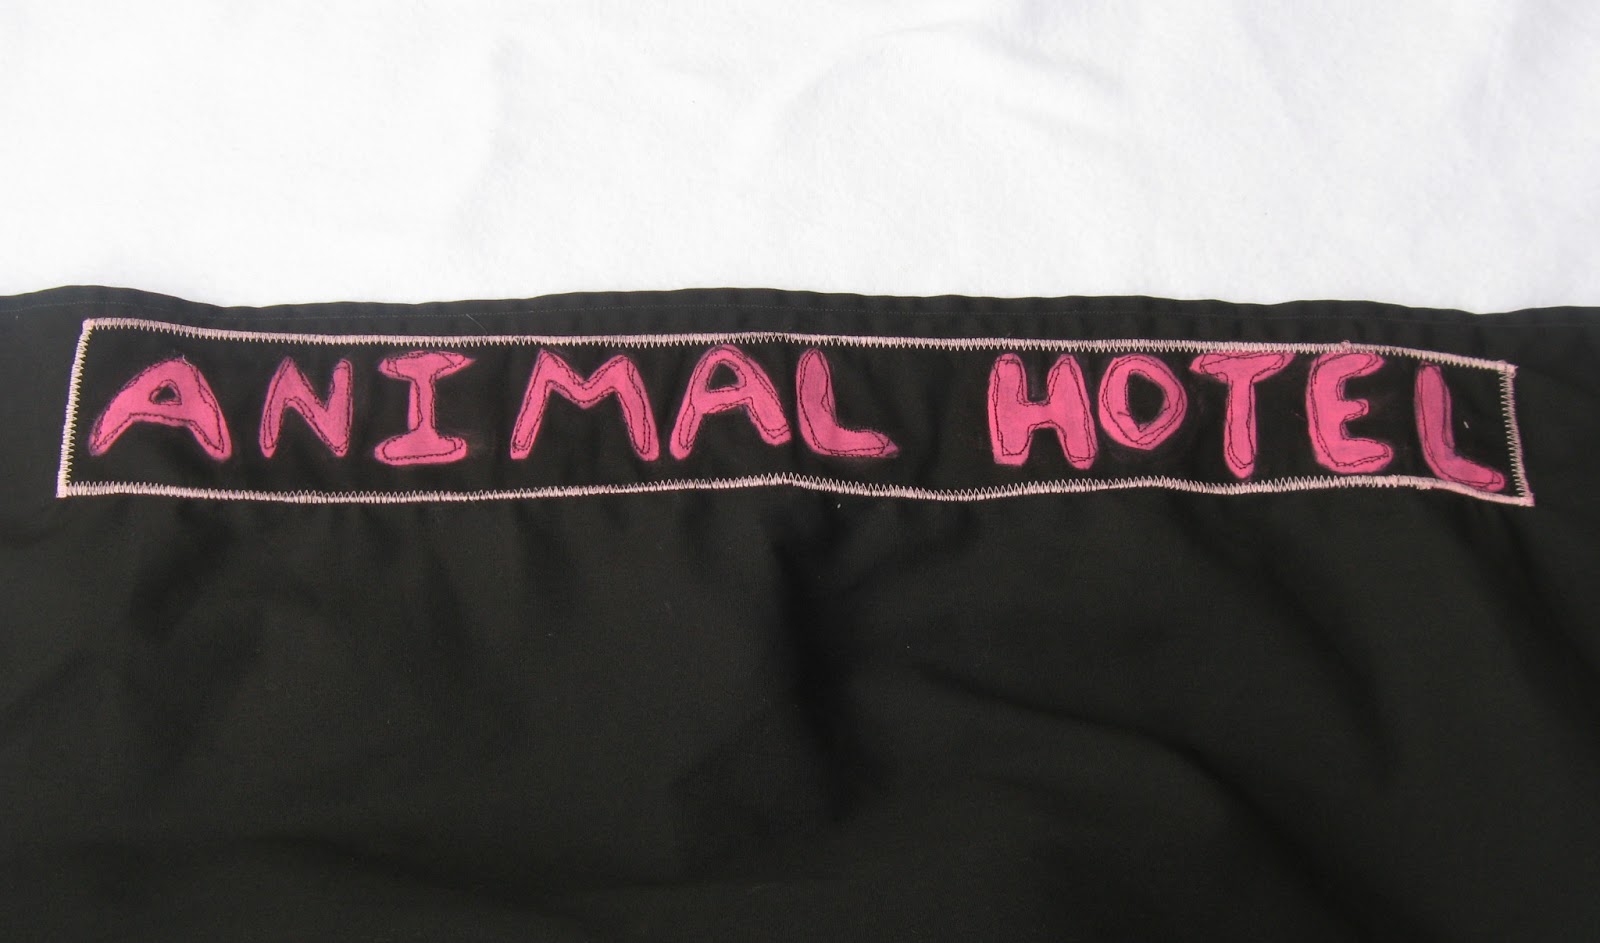

STEP 3) Now it is time to add some decorations if you want. I have been reading a lot about painting with Acrylics on fabric lately, so I wanted to give that a try. If you have read other post, you also know that I am interested in free motion stitching, so I decided to do some 'messy' stitching on top of the letter after the paint was dry.
You will also notice that there is stitching around the lettering. I actually was practicing on a scrap piece to see if I liked the pink paint. I decided to just stitch that onto the main fabric so I would not have to do it again! I used a zig zag stitch all the way around 2x.

____________________________________________________________________________
A NOTE ABOUT FREE MOTION STITCHING- SKIP THIS STEP IF YOU DON'T CARE! :)
*Free Motion Stitching: Far away you can hardly see my messy stitching, but it was good practice. I really wanted to free motion around the flowers, but did not want to waste the thread. If you would like to try some free motion stitching, here are the steps you need to follow.
1. Find a darning foot or a free motion quilting foot. I bought mine from Amazon- click HERE to see. I altered mine a little, but bought this one b/c it is the most affordable.
2. Lower your feed dogs. The feed dogs are what moves the material along as you are sewing. When you are free motion sewing you want these to be down so YOU can be the one moving the fabric wherever you want it to go. You will have to consult your sewing machine's manual to see how to do this. Mine has a little switch on the back of the machine. The arm of my machine is actually hiding it.
3. Set stitch length to 0 and select the straight stitch setting.
4. Stitch away! Slow and steady!
_____________________________________________________________________________


And voila! My girls loved it, of course!

STEP 4) It's now time to add some elastic to hold the animals in place. I used Non-Roll Elastic, 3/4 wide. I sewed a zig zag stitch every 5 inches or so. I made a couple only 4" apart for smaller animals. For the bottom row, I added a little give so the bigger animals could squeeze in a little more easily. Make sure you stitch back and for A LOT so the elastic is very secure.
STEP 5) Hanging this puppy is what I was concerned about. I really wanted grommets, but that THING you have to buy to add the grommets was really expensive. Maybe there is a cheaper way? I decided to just make 5 button holes instead and then just nail it to the wall. I thought the button hole would prevent the material from tearing? It looks pretty stable to me. If I have issues I'll let you know. If you have any better ideas, please let me know!
All that is left is to add those animals. I was able to make 12 spaces for animals. I squeezed 2 little ones in 1 and squeezed in a couple of barbie dolls too. Last night my oldest reached up and picked out what she wanted to sleep with, 5 to be exact. And then this morning she made her bed and put them back. I could tell she thought that was fun.
Now for the other bug-a-boo. She is in a toddler bed, so I think I'll turn the fabric the other way. It looks better if it is about the same size as their bed. I'll post that one when I'm finished. She wants purple paint, which I don't have, of course! :)
If you make one of these will you please let me know so I can see it!
If you want to know when I post next you can do the following:
1. Like me on facebook: www.facebook.com/ginascraftcorner
2. Follow me by clicking on the blue "Join this site" tab
3. G+1 me at the bottom of this post.
Thanks for visiting!
~Gina
I linked up here:
Thursday
A Delightsome Life, The Brmbleberry Cottage, Seven Alive all Livin' in a Double Wide, Artsy-fartsy mama, The Crafty Blog Stalker, Somewhat Simple, Domesblissity, Happy and Blessed Home)
Friday


Such a cute idea! I have been looking for ways to get all the stuffed animals off of my girls' beds. One daughter rolls off the bed all the time because she has so many. Most of theirs are so big that I don't think they would fit on there. They have several pillow pets each. I have made them get rid of some of them but it seems like every year at Christmas or birthdays they get a few more.
ReplyDeleteUgh! The pillow pets!! Now, I would be willing to throw those into a beanbag case. It WOULD be really soft. My girls have 2 each, maybe 3. I let them choose one pillow pet (not to be included in the top 10). They really do not use them much anymore now that the novelty is gone.
DeleteThanks so much for stopping by!
Great idea, Gina! I love how you stamped with the soda bottle!
ReplyDeleteThanks, Heidi! I saw that on the blog 'House and Home'. Thanks for stopping by!
DeleteYour very creative! I am new from southern charm! I would love for you to check out my blog and hopefully follow me back! Nicole
ReplyDeleteHi, Nicole! Thanks so much for visiting, for the compliment AND for following! Of course, I'll visit and follow. :)
Delete~Gina
This is a really cool idea. I recently made the mistake of packing all my kids excess stuffed animals (there are many of them) into a garbage bag to donate to the local second hand shop. Needless to say, it's all been unpacked again before I could take it there. This could be a good solution. Thanks for visiting & following The Craft Train.
ReplyDeleteThanks for the comment! Our kids and our stuffed animals- a delicate thing. I've learned not to disturb this relationship for now. Soon, they will be begging me to get rid of them and I will be resisting! :) "But it's elmo!! Don't you want to take him to college with you!" Then, I will be the one holding on to him. :) So glad you visited!
DeleteWhat a fun idea! When my boys were younger they would have loved something like this! I just pinned this :) Thank you so much for linking up with me @ Great Idea Thursday's! Krista @ A Handful of Everything
ReplyDelete